livialovia
Live. Love. Do.
  • About
    • About the Creator
  • My Etsy Shop
  • Custom Costumes
  • Contact

Need an Easter Do-it-Yourselfer?

3/29/2015

0 Comments


DIY:  Mini Easter Pots

Picture
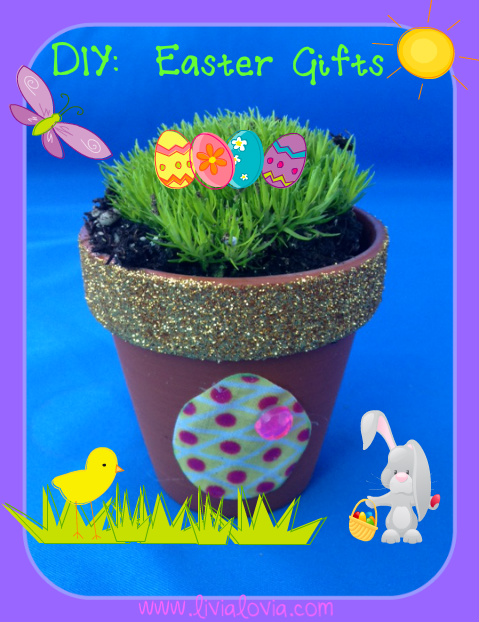
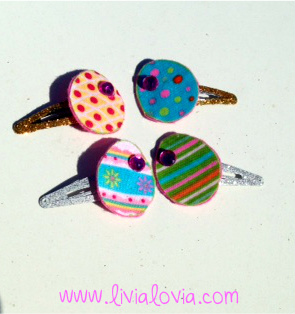
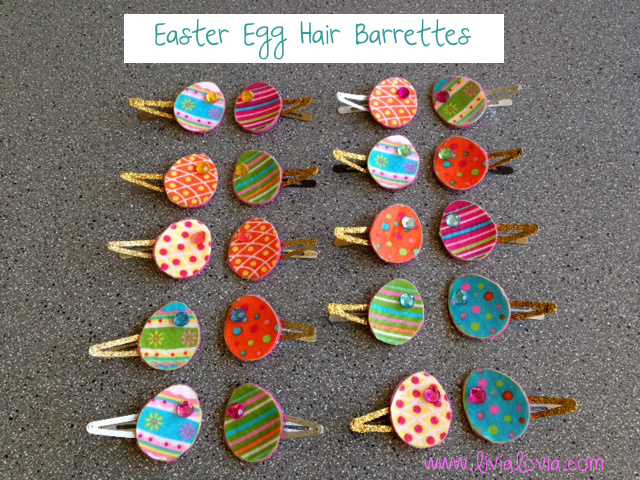
After finishing my sister's bridal shower favors, I had a handful of the mini ceramic pots as leftover.  With Easter around the corner, I thought why not use the extra pots and turn them into an Easter DIYer!  I combined the decor I used for my sister's shower favors with the Easter egg cutouts from my Easter Egg Hair Barrettes (see earlier post), and came up with this super cute gift!
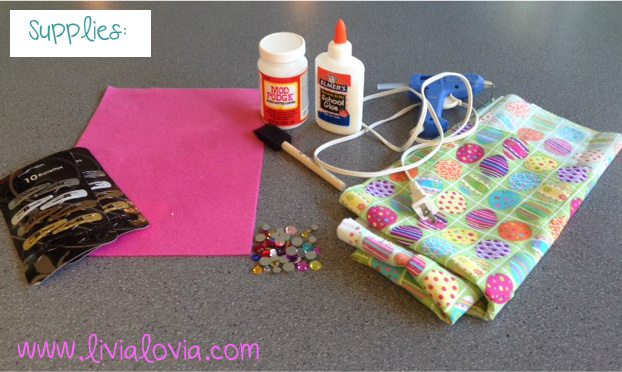
Supplies:

1.  Mini Ceramic Pots -- (I purchased mine at the Dollar Store.  I ordered a bulk order from their online store, and each pot came to only $0.33 each!)
2.  Glitter -- (I used the gold glitter I had on hand, leftover from another project)
3.  Mod Podge
4.  Paintbrush
5.  Easter Egg Cut-Outs -- (My Easter egg fabric cut-outs were leftover from my hair barrette project -- see post below)
6.  Rhinestones
7.  Hot Glue Gun & Glue
8.  Any "Ground Cover" Foliage -- (I purchased these mini ground covers at Orchard Supply; 6 came in a pack for $4.99) 

Here's How:

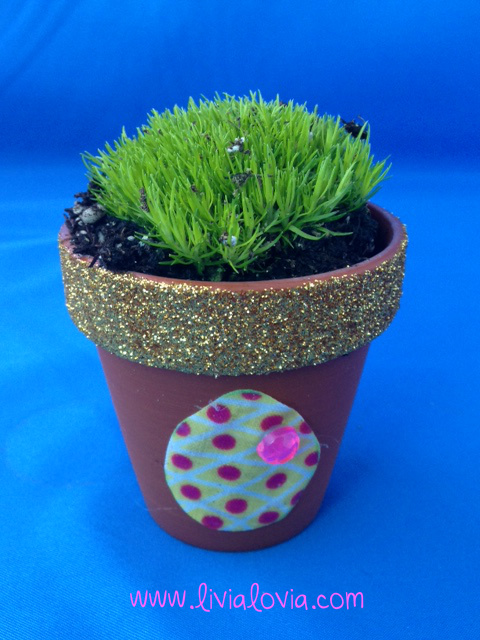
1.  Using Mod Podge and my paintbrush, I painted the Mod Podge on the rim of the pot, making sure it had a nice thick coat to grab a lot of glitter.
2.  I rolled the Mod-Podged rim of the pot into the gold glitter (I used a paper towel, and just poured enough glitter to make a large loose glitter hump in the middle of the towel, then rolled the rim about 5-6x in the hump of loose glitter until the rim was all coated).
3.  Using my hot glue gun, I glued the fabric Easter egg cut-out below the rim.  Then, I hot-glued the rhinestone on the cut-out. 
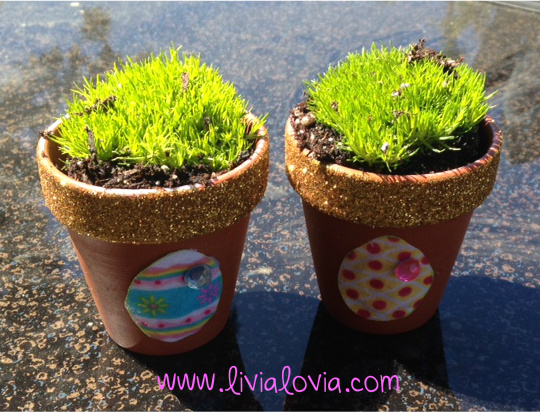
4.  Lastly, I planted the ground cover into the pot. 

Happy Easter DIY-ing!
Picture
Picture
0 Comments

Yarn-Fetti!

3/28/2015

0 Comments


A Perfect Shower Gift for Baby Girl

I first spotted this funfetti yarn while browsing at Michaels with my friend, Anne.  Who knew that my favorite cake flavor would somehow morph into my new favorite yarn!?  Who can resist those yummy bits of flavor packed into every bite and stitch!  I knew that I had to think of something to make with this yarn -- anything, really.  And here's what I came up with:
Picture

Want to Make Your Own?

Here's How:

1.  Brimmed Sunhat:  I used Repeat Crafter Me's Watermelon Sun Hat pattern as a foundation pattern, using my own colors as seen. I then wove a lavender ribbon through the double crochet stitches on the round above the brim.  I used the same lavender ribbon to fashion a bow and then glued it on, finishing it off with a much needed purple rhinestone to catch light.

2.  Booties:  I used Moogly's Loopy Newborn Booties pattern as a foundation pattern, using my own colors as seen.  I then fashioned a bow out of the same lavender ribbon with a purple rhinestone, and glued it to the front center of the booty to match the brimmed hat.

3.  Onsie:  I used one of my ultimate favorite onsie patterns out of my favorite baby crochet book, Baby Crochet by Sandy Powers. (On the right side of my website, the link to purchase the book is listed under "My Favorite Baby Crochet Books.")  I used Sandy's pattern, again, as a foundation pattern, putting my own spin with the yellow ruffles as seen in the photos.

Happy Crocheting!


Picture
Picture
Picture
0 Comments

DIY:  Easter Egg Hair Barrettes 

3/27/2015

0 Comments

 
Picture

Supplies:

Picture
1.   Easter Egg Fabric (I found this handy remnant in the 50% off          pile at Jo-Ann Fabrics!)
2.  Felt (I chose pink, but feel free to use whatever color you like          best for the backing/reinforcement of the egg)
3.  Mod Podge (I used the Gloss Lustre only because the fabric already had a shimmer/sparkle within the cotton; otherwise, I would have used the Sparkle finish)
4.  Paintbrush
5.  Elmer's Glue
6.  Hot Glue Gun & Glue Sticks
7.  Scissors
8.  Rhinestones -- small
9.  Hair Barrettes

Here's How:

1.  Using scissors, I cut out the egg shape from the fabric.  I cut out 20 eggs in order to make 10 sets of barrettes.

2.  Using the Mod Podge and the painbrush, I coated the front (right side) of the cut-out eggs, and laid them on the counter to dry.  I re-mod-podged them for a second coating.  I did this to harden the fabric (slightly), and to make them waterproof (slightly).  Be sure to clean and rinse off the paintbrush after using the Mod Podge (and glue in the next step) to avoid ruining it!

3.  Using the Elmer's glue and the paintbrush, I painted glue on the back (wrong side) of the cut-outs, and firmly placed/glued them to the pink felt. 

4.  After the glue dried, I used scissors to cut out the egg shapes from the felt.  With the 2 coats of Mod Podge and the felt backing, the egg shapes are now pretty solid feeling.

5.  I took the egg cut-outs, and hot-glued them to the ends of the barrettes.

6.  I picked out matching rhinestones, and hot-glued them to the eggs to give them some more sparkle! 

Happy Easter!
Picture
Picture
0 Comments
<<Previous
    Picture

    Just A Glimpse

    A glimpse into my personal DIY trials and errors, mommyhood, and my worldview.
    Picture

    The Creator

    Hi!  My name is Nicole, and I'm a full-time wife and mother, and a part-time dental hygienist and crafter. Creativity runs in my blood, and after 30 (plus) years, I am finally devoting the time to realize my own artistic talent (and having so much fun in the process!).  Want to know more?  Click here!


    Love Livialovia?

    livialovia

    Check It Out --My Favorite Baby Crochet Books!

    Or, search below for other favorite crochet books and accessories!


    daily boutique deals
    Free Shipping over $75
    First Order ships for $2.95
    Free crochet patterns - download today!
    Stride Rite

    Archives

    January 2016
    December 2015
    November 2015
    October 2015
    May 2015
    March 2015
    February 2015
    January 2015
    September 2014
    August 2014
    June 2014
    May 2014
    March 2014
    February 2014
    January 2014
    December 2013
    November 2013
    October 2013

    Categories

    All
    Apple Pie Recipe
    Baby Crochet Hat
    Baby Shower Gift
    Barter
    Bonding Over Bumps
    Crochet
    Crochet Projects
    Crochet Scarf
    Diy Christmas Decor
    DIY Hair Barrettes
    Easter
    Etsy
    Fabric-Lined Crochet Purse Pouch
    Free Pattern Round Up
    Free Pattern Round-Up
    Frozen-Inspired Crochet
    Hello IVF
    Hooded Scarf
    Hypothalamic Amenorrhea
    Mommy Marvels
    Numb To The Negatives
    Pet Costumes
    Repurpose
    Sewing Projects
    Thanksgiving
    Tooth Fairy Pillows
    Vinyl Stool Covers
    Welcome
    Where The Wild Things Are

    RSS Feed

    Powered by Jasper Roberts Consulting - Widget
Picture