
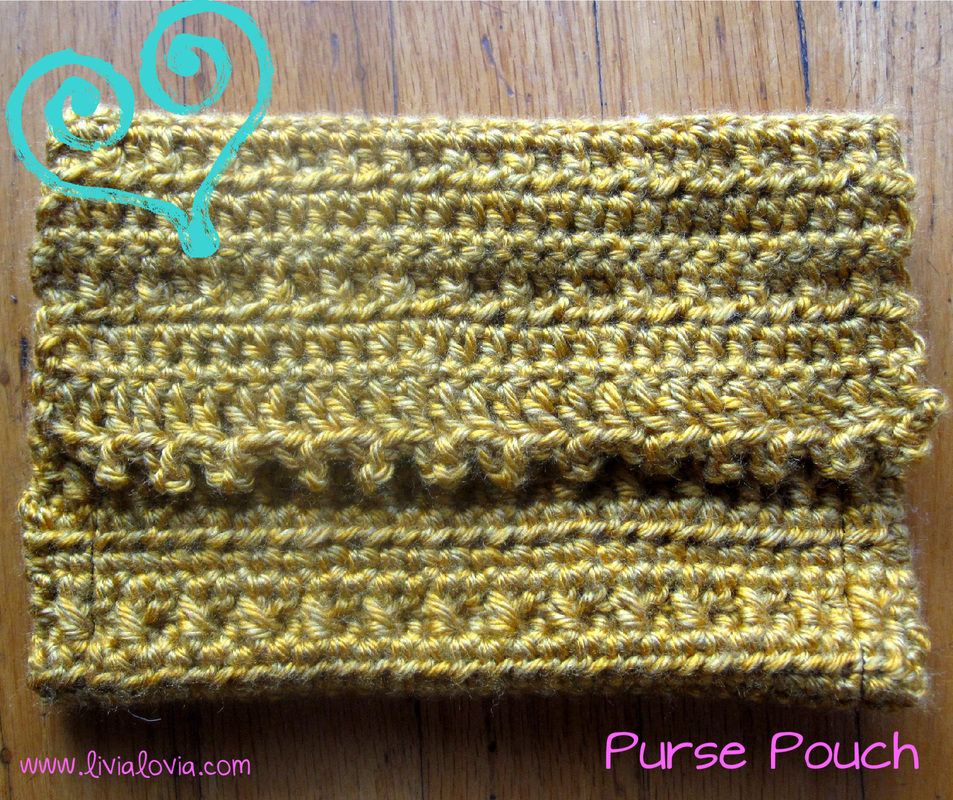
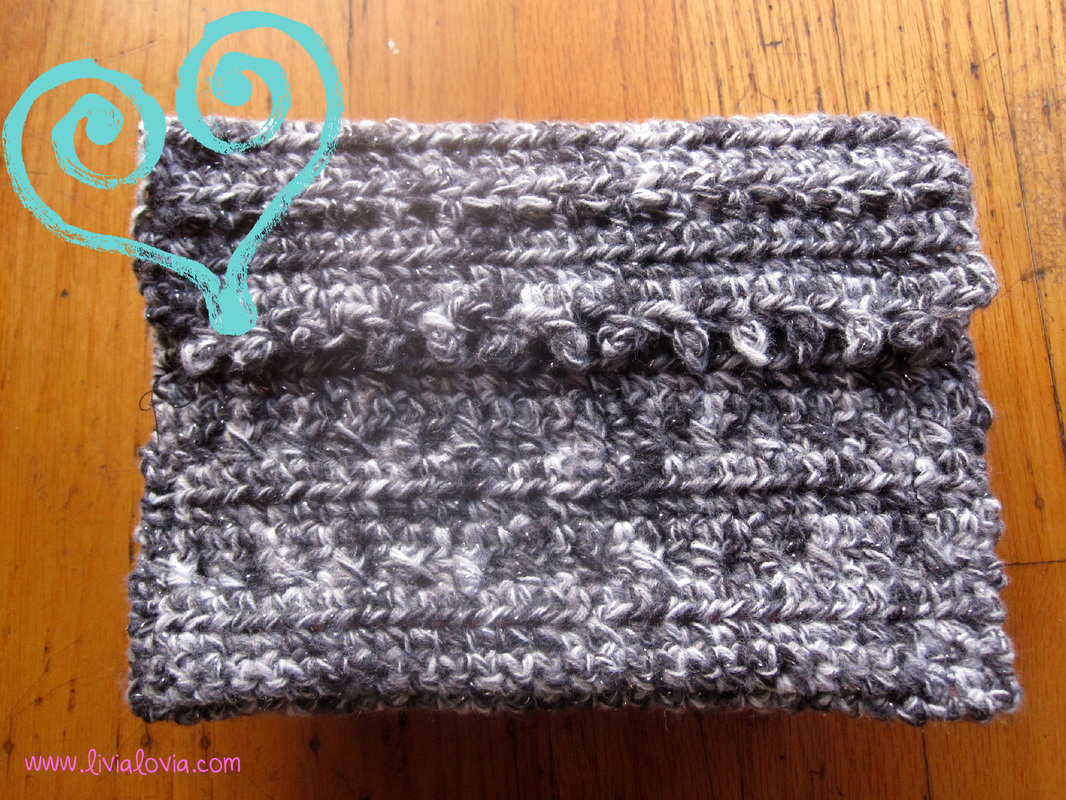
I am VERY proud to unveil my first ever crochet design.
Motivated by my goal to handmake 75% of my christmas gifts this year, I designed a fabric-lined purse pouch (a cosmetic, toiletry, money, or just whatever bag) that many of my female family members or friends will love!
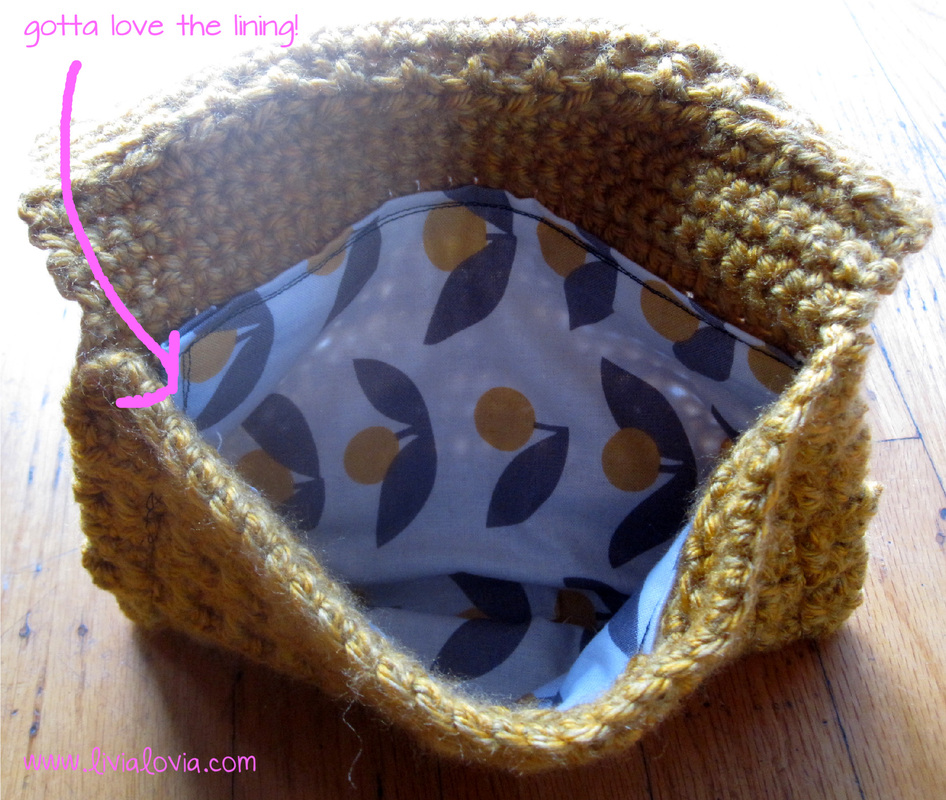
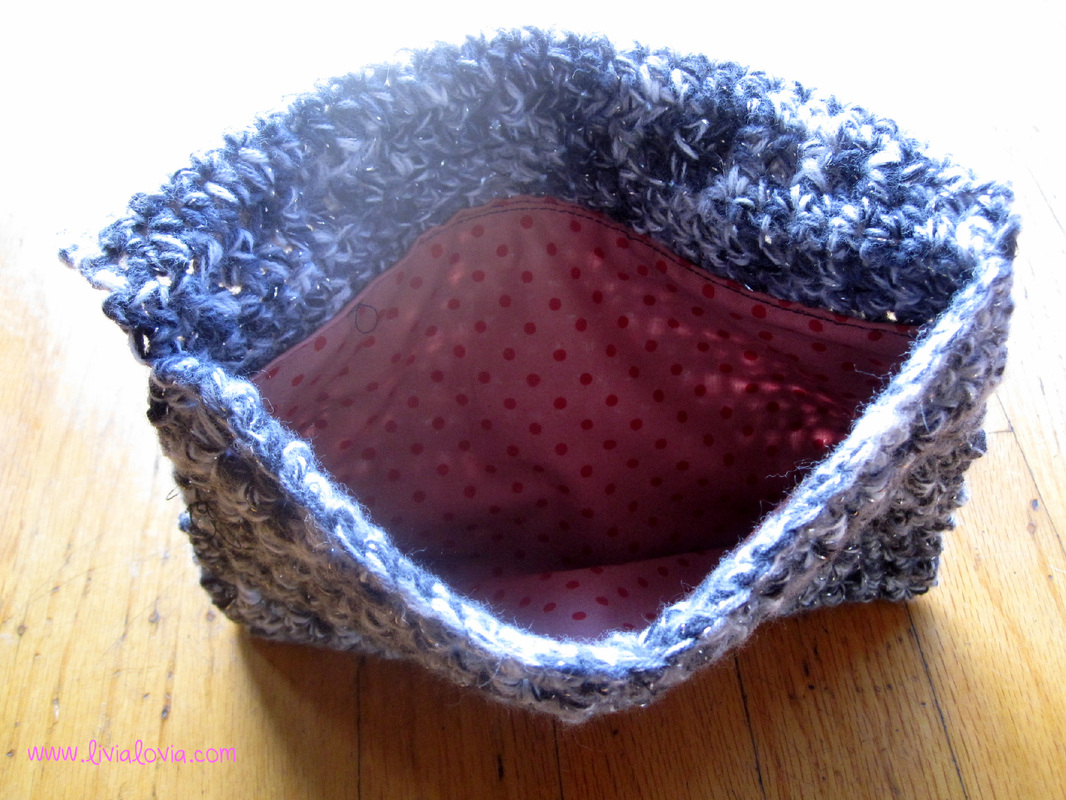
You may leave the bag unlined or you may line it with any matching or contrasting fabric to add a special touch!
What You'll Need:
Yarn (I used Red Heart Shimmer Worsted Weight)
Size H Hook
Needle (for weaving in the ends)
Matching/Contrasting Fabric (fat quarter)
Thread
Scissors
Sewing Machine
Magnets (optional for purse closure) & Glue Gun
Here's How:
First, crochet the purse pouch.
Gage: Isn't particularly important as the purse isn't "fitting" anybody.
Stitches Used: Slip Stitch, Single Crochet (Sc), Half-Double Crochet (HDC), Front-Post Half-Double Crochet (FPHDC), Back-Post Half-Double Crochet (BPHDC), Picot
Body
Rnd 1) Ch3. Turn.
Rnd 2) Sc across (29). Turn.
Rnd 3) Ch2. HDC across (29). Turn.
Rnd 4) Ch2. *HDC in first ch, FPHDC in next ch*; Repeat from * to *, ending in last ch (29). Turn.
Rnd 5) Ch2. HDC across (29). Turn.
Rnd 6) Ch1. Sc across (29). Turn.
Rnd 7) Ch2. HDC across (29). Turn.
Rnd 8) Ch2. *HDC in first ch, FPHDC in next ch*; Repeat from * to *, ending in last ch (29). Turn.
Rnd 9) Ch2. HDC across (29). Turn.
Rnd 10) Ch1. Sc across (29). Turn.
Rnd 11) Ch2. HDC across (29). Turn.
Rnd 12) Ch2. *HDC in first ch, FPHDC in next ch*; Repeat from * to *, ending in last ch (29). Turn.
Rnd 13) Ch2. HDC across (29). Turn.
Rnd 14) Ch1. Sc across (29). Turn.
Rnd 15) Ch2. HDC across (29). Turn.
Rnd 16) Ch2. *HDC in first ch, FPHDC in next ch*; Repeat from * to *, ending in last ch (29). Turn.
Rnd 17) Ch2. HDC across (29). Turn.
Rnd 18) Ch1. Sc across (29). Turn.
Rnd 19) Ch1. Sc across (29). Turn. (This is where you will fold the body in half when complete. See pic for explanation)
Rnd 20) Ch1. Sc across (29). Turn.
Rnd 21) Ch1. Sc across (29). Turn.
Rnd 22) Ch2. HDC across (29). Turn
Rnd 23) Ch2. HDC across (29). Turn
Rnd 24) Ch2. HDC across (29). Turn
Rnd 25) Ch2. HDC across (29). Turn
Rnd 26) Ch2. HDC across (29). Turn
Rnd 27) Ch2. HDC across (29). Turn
Rnd 28) Ch2. HDC across (29). Turn
Rnd 29) Ch2. HDC across (29). Turn
Rnd 30) Ch2. HDC across (29). Turn
Rnd 31) Ch2. HDC across (29). Turn
Rnd 32) Ch2. HDC across (29). Turn
Rnd 33) Ch2. HDC across (29). Turn
Flap
Rnd 34) Ch1. Sc across (29). Turn.
Rnd 35) Ch1. Sc across (29). Turn. (This is where you will fold the flap over to cover the purse opening. See pic for explanation)
Rnd 36) Ch1. Sc across (29). Turn.
Rnd 37) Ch1. Sc across (29). Turn.
Rnd 38) Ch2. HDC across (29). Turn.
Rnd 39) Ch2. *HDC in first ch, BPHDC in next ch*; Repeat from * to *, ending in last ch (29). Turn.
Rnd 40) Ch2. HDC across (29). Turn.
Rnd 41) Ch1. Sc across (29). Turn.
Rnd 42) Ch2. HDC across (29). Turn.
Rnd 43) Ch2. *HDC in first ch, BPHDC in next ch*; Repeat from * to *, ending in last ch (29). Turn.
Rnd 44) Ch2. HDC across (29). Turn.
Rnd 45) Ch1. Sc across (29). Turn.
Rnd 46) Ch2. HDC in first ch; HDC in next ch; Ch3. Slip Stitch in 3rd ch from hook (picot); *HDC in next ch; HDC in next chain; Ch3. Slip Stitch in 3rd ch from hook (picot)*; Repeat from * to * ending in last ch.
Weave in ends.
Motivated by my goal to handmake 75% of my christmas gifts this year, I designed a fabric-lined purse pouch (a cosmetic, toiletry, money, or just whatever bag) that many of my female family members or friends will love!
You may leave the bag unlined or you may line it with any matching or contrasting fabric to add a special touch!
What You'll Need:
Yarn (I used Red Heart Shimmer Worsted Weight)
Size H Hook
Needle (for weaving in the ends)
Matching/Contrasting Fabric (fat quarter)
Thread
Scissors
Sewing Machine
Magnets (optional for purse closure) & Glue Gun
Here's How:
First, crochet the purse pouch.
Gage: Isn't particularly important as the purse isn't "fitting" anybody.
Stitches Used: Slip Stitch, Single Crochet (Sc), Half-Double Crochet (HDC), Front-Post Half-Double Crochet (FPHDC), Back-Post Half-Double Crochet (BPHDC), Picot
Body
Rnd 1) Ch3. Turn.
Rnd 2) Sc across (29). Turn.
Rnd 3) Ch2. HDC across (29). Turn.
Rnd 4) Ch2. *HDC in first ch, FPHDC in next ch*; Repeat from * to *, ending in last ch (29). Turn.
Rnd 5) Ch2. HDC across (29). Turn.
Rnd 6) Ch1. Sc across (29). Turn.
Rnd 7) Ch2. HDC across (29). Turn.
Rnd 8) Ch2. *HDC in first ch, FPHDC in next ch*; Repeat from * to *, ending in last ch (29). Turn.
Rnd 9) Ch2. HDC across (29). Turn.
Rnd 10) Ch1. Sc across (29). Turn.
Rnd 11) Ch2. HDC across (29). Turn.
Rnd 12) Ch2. *HDC in first ch, FPHDC in next ch*; Repeat from * to *, ending in last ch (29). Turn.
Rnd 13) Ch2. HDC across (29). Turn.
Rnd 14) Ch1. Sc across (29). Turn.
Rnd 15) Ch2. HDC across (29). Turn.
Rnd 16) Ch2. *HDC in first ch, FPHDC in next ch*; Repeat from * to *, ending in last ch (29). Turn.
Rnd 17) Ch2. HDC across (29). Turn.
Rnd 18) Ch1. Sc across (29). Turn.
Rnd 19) Ch1. Sc across (29). Turn. (This is where you will fold the body in half when complete. See pic for explanation)
Rnd 20) Ch1. Sc across (29). Turn.
Rnd 21) Ch1. Sc across (29). Turn.
Rnd 22) Ch2. HDC across (29). Turn
Rnd 23) Ch2. HDC across (29). Turn
Rnd 24) Ch2. HDC across (29). Turn
Rnd 25) Ch2. HDC across (29). Turn
Rnd 26) Ch2. HDC across (29). Turn
Rnd 27) Ch2. HDC across (29). Turn
Rnd 28) Ch2. HDC across (29). Turn
Rnd 29) Ch2. HDC across (29). Turn
Rnd 30) Ch2. HDC across (29). Turn
Rnd 31) Ch2. HDC across (29). Turn
Rnd 32) Ch2. HDC across (29). Turn
Rnd 33) Ch2. HDC across (29). Turn
Flap
Rnd 34) Ch1. Sc across (29). Turn.
Rnd 35) Ch1. Sc across (29). Turn. (This is where you will fold the flap over to cover the purse opening. See pic for explanation)
Rnd 36) Ch1. Sc across (29). Turn.
Rnd 37) Ch1. Sc across (29). Turn.
Rnd 38) Ch2. HDC across (29). Turn.
Rnd 39) Ch2. *HDC in first ch, BPHDC in next ch*; Repeat from * to *, ending in last ch (29). Turn.
Rnd 40) Ch2. HDC across (29). Turn.
Rnd 41) Ch1. Sc across (29). Turn.
Rnd 42) Ch2. HDC across (29). Turn.
Rnd 43) Ch2. *HDC in first ch, BPHDC in next ch*; Repeat from * to *, ending in last ch (29). Turn.
Rnd 44) Ch2. HDC across (29). Turn.
Rnd 45) Ch1. Sc across (29). Turn.
Rnd 46) Ch2. HDC in first ch; HDC in next ch; Ch3. Slip Stitch in 3rd ch from hook (picot); *HDC in next ch; HDC in next chain; Ch3. Slip Stitch in 3rd ch from hook (picot)*; Repeat from * to * ending in last ch.
Weave in ends.

Second, break out your lining fabric, scissors, thread, and sewing machine. Remember, this second part is optional as you may just whip stitch the sides of the body together. The lining just adds a special touch!
Lining
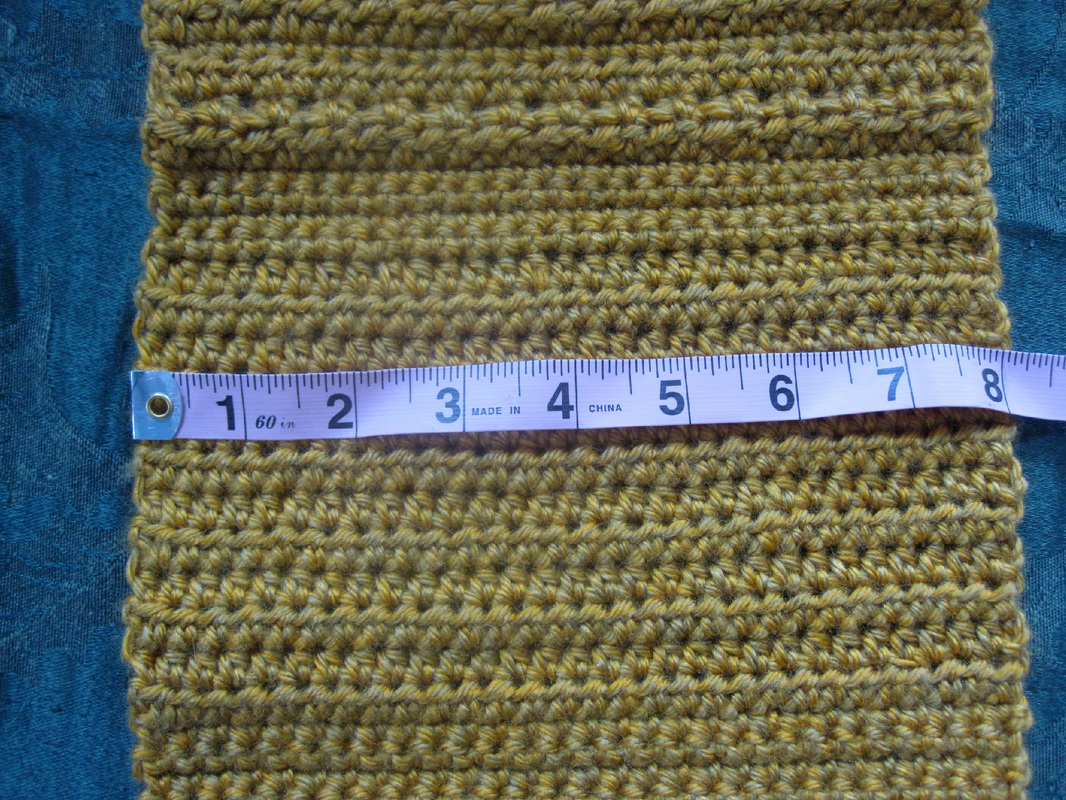
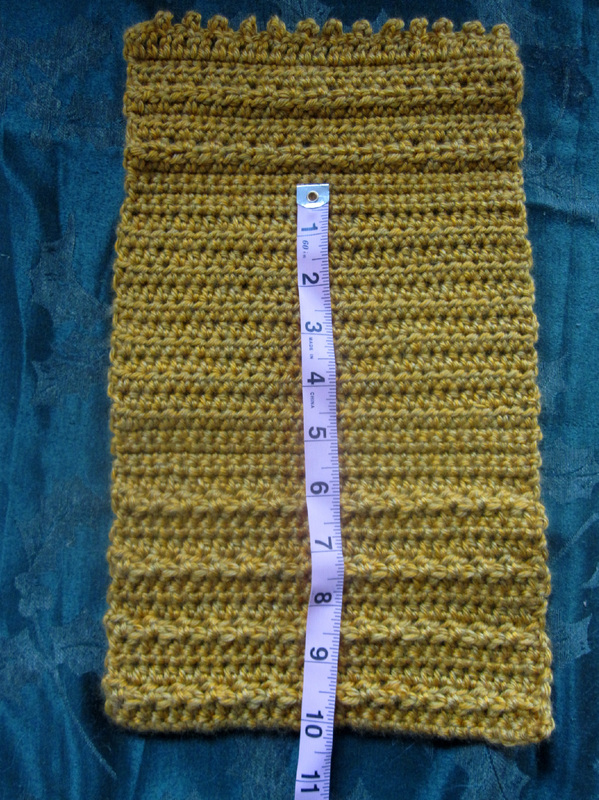
1) Measure the body of your purse -- do not include the flap part in your measurement! Mine turned out to be 8x10".
2) Iron your fabric!!
3) Cut your lining fabric by the same dimensions. Therefore, I cut my fabric 8x10".
4) Allow for a 1/2" seam allowance on all sides -- pin.
5) Sew seam on all four sides.
6) Sew lining into body of purse.
7) Fold over and whip-stitch sides of body of purse.
8) Fold flap over opening!
9) You may add a magnetic closure by glueing the magnets where appropriate. I added the magnets after realizing it needed that "something" to keep it closed.
Lining
1) Measure the body of your purse -- do not include the flap part in your measurement! Mine turned out to be 8x10".
2) Iron your fabric!!
3) Cut your lining fabric by the same dimensions. Therefore, I cut my fabric 8x10".
4) Allow for a 1/2" seam allowance on all sides -- pin.
5) Sew seam on all four sides.
6) Sew lining into body of purse.
7) Fold over and whip-stitch sides of body of purse.
8) Fold flap over opening!
9) You may add a magnetic closure by glueing the magnets where appropriate. I added the magnets after realizing it needed that "something" to keep it closed.
 |  |
*This design has been copyrighted. Please make and sell as you wish, but do not plagiarize, copy, or infringe upon my pattern -- it took a lot of effort, and I'd appreciate a shout-out or link!***Also note that you may see flaws in the sewing technique of the lining because I am a BEGINNER sewer, remember?! But the crocket design should be flawless as I've followed my own pattern and have been able to recreate it. Let me know if you have questions or comments!**


 RSS Feed